Mountaineering Boots: is the first of a series of beginners guides covering the basic gear you need if you starting to discover the outdoors for the first time. Other guides will include choosing hiking boots, buying a first stove, sleeping bag and tent.
Buying your first pair of mountaineering boots (or, for that matter, hiking boots) is your first real step towards independent exploration. You can borrow just about any piece of equipment (though I must confess that I’m not keen on sleeping in another person’s sleeping bag). In fact you are usually best off borrowing major items such as tents until you know that you are sure you want to invest the time and money involved in mountaineering and hiking and also until you know what gear you want. But because getting the fit of a boot right you are unlikely to be able to borrow boots (and exception is double plastic mountaineering boots, about which I’ll say more later).

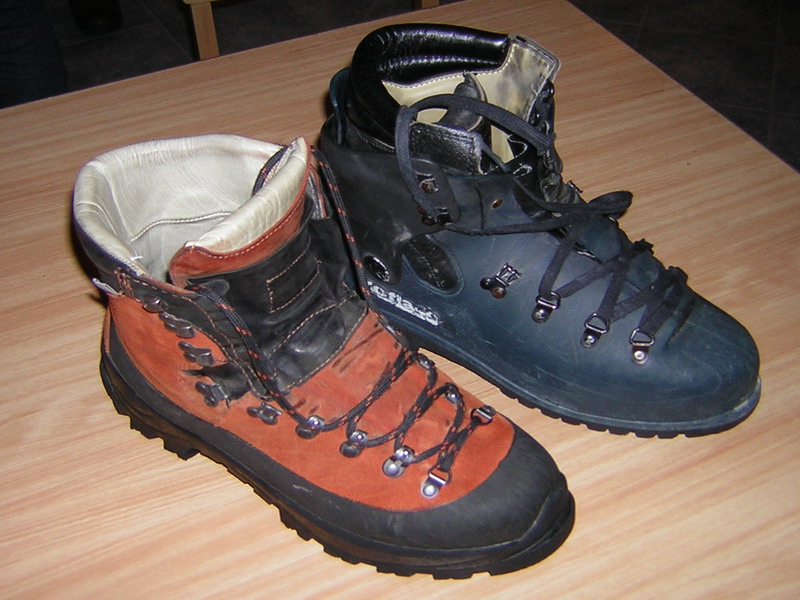
An example of a classic mountaineering boot.
A common myth about mountaineering boots
The first myth to dispel about mountaineering boots is that they are good for “heavy hiking” or carrying a heavy pack. In my experience that is not true at all. Proper mountaineering boots have to be stiff enough to hold a crampon so they have a shank running either all or much of the length of the boot. This steel is meant to make the boot rigid because if it flexes then your crampons will pop right off. While kicking steps in snow and doing other ascents you also want a really rigid boot because you will often be supporting all of your weight on just a small part of the boot (such as the toe or edge). Without the extra support from a shank your calves would burn up really quickly from taking all the weight themselves.
The problem with this, though, is that when walking your foot is more comfortable if it can flex a little. So most hiking boots will have sole that bends. The simple way to tell the two apart is to simply grasp a boot at the toe and heel and bend down hard. If it doesn’t move at all then you know it has a shank.
Many manufacturers have tried to get around this by having a shorter shank (so the boot is semi-rigid) and rating the boot for a different class of crampon. They will also often try to add a rocker to the bottom of the sole so that your foot “rocks” forward from heel to toe with
each step that you take. These are not a bad compromise and are far better for walking in than old-style fully rigid boots but even so I find that my feet tire much more quickly when hiking for long distances in a fully rigid boot. I also don’t see why I should carry the extra weight of a shank and insulation that I don’t really don’t need when I’m just hiking.
In fact I sometimes go to the opposite extreme and try to hike in a light shoe when carrying a day pack (or even an overnight pack) and keep my heavy boots and crampons only for the bits when I’m actually getting into snow or crossing ice. I know I’m not alone in believing that a comfortable approach shoe is far more practical to use when getting into the hills than a heavy boot.
So forget the advice that friends or sometimes sales assistants give about how for heavy trails you need a really heavy mountaineering boot. A lighter hiking boot or hiking shoe will probably do you much better if you are not planning on crossing ice or climbing in snow.
Choosing a mountaineering boot
Once you’ve decided that you actually need mountaineering boots rather than just good hiking boots, then you need to decide on the sort of mountaineering you will be doing. In general you have what are known as Alpine boots and expedition boots. Alpine mountaineering boots (sometimes these are also called mountain hiking boots) are generally made of leather and are great for a light and fast 1-day ascent and descent or perhaps 2-3 days on the mountain. Some classic examples of plain leather mountaineering boots are the Scarpa Manta or La SportivaMakalu . I’d say that both of these brands are high up there among the list of the best mountaineering boots you can get for general use.
Plastic Mountaineering Boots vs Leather ones
Slightly bigger and better insulated boots are also an option for higher or colder mountaineering. These include boots such as They are also great for some European-style mountaineering where you go from one refuge to another and have the ability to dry them overnight But if you are planning to spend more time on a mountain in a tent then you need a full expedition boot with a removable inner insulated boot. The inner comes out so that you can dry it in your sleeping bag on expeditions where you are spending several days above the snow line. Trying to do the same in a single-layer leather boot will leave you with cold and wet feet and a greater risk of getting frostbite and perhaps loosing a toe.
The downside of big plastic boots is that they are heavy, clunky and very uncomfortable. Times have changed and the old Scarpa Vega and Asolo boots that were the uncomfortable warhorses of almost all major expeditions a decade or so ago have been replaced by much lighter and more comfortable versions such as the Scarpa Omega. But you still don’t want to be wearing plastic boots unless you really need them.
Earlier I mentioned that you want to own your own boots. Plastics are a different matter as you can often hire them, which is a great way of finding out which ones work for you. It can also save you having to buy a pair if you only do occasional expeditions. Buying your first set ofmountaineering boots means taking the first step to enjoying the freedom of the hills. Choose wisely and enjoy.